


DIY Faux Brick Fireplace Surround | One Room Challenge: Week Three
I’m back for another week of the One Room Challenge, not with sconces, but instead with a walkthrough of how we got the fireplace to where it is today!
I feel like the fireplace in this room proved a real design challenge for a few reasons so I wanted to walk you through what I was faced with, why I chose this path, and how we built and finished the surround - the mantle will be built separately and will come in a future week!
A gas fireplace is the stuff of dreams for me - all the warmth and coziness of a real fire but without the chore and mess of chopping wood and carrying it into your home. I was thrilled to find that the house already had a good quality gas fireplace insert hooked up and running. As I mentioned in week one though, everything surrounding the insert was kind of a hot mess. To recap, here’s where we started:

Before moving in
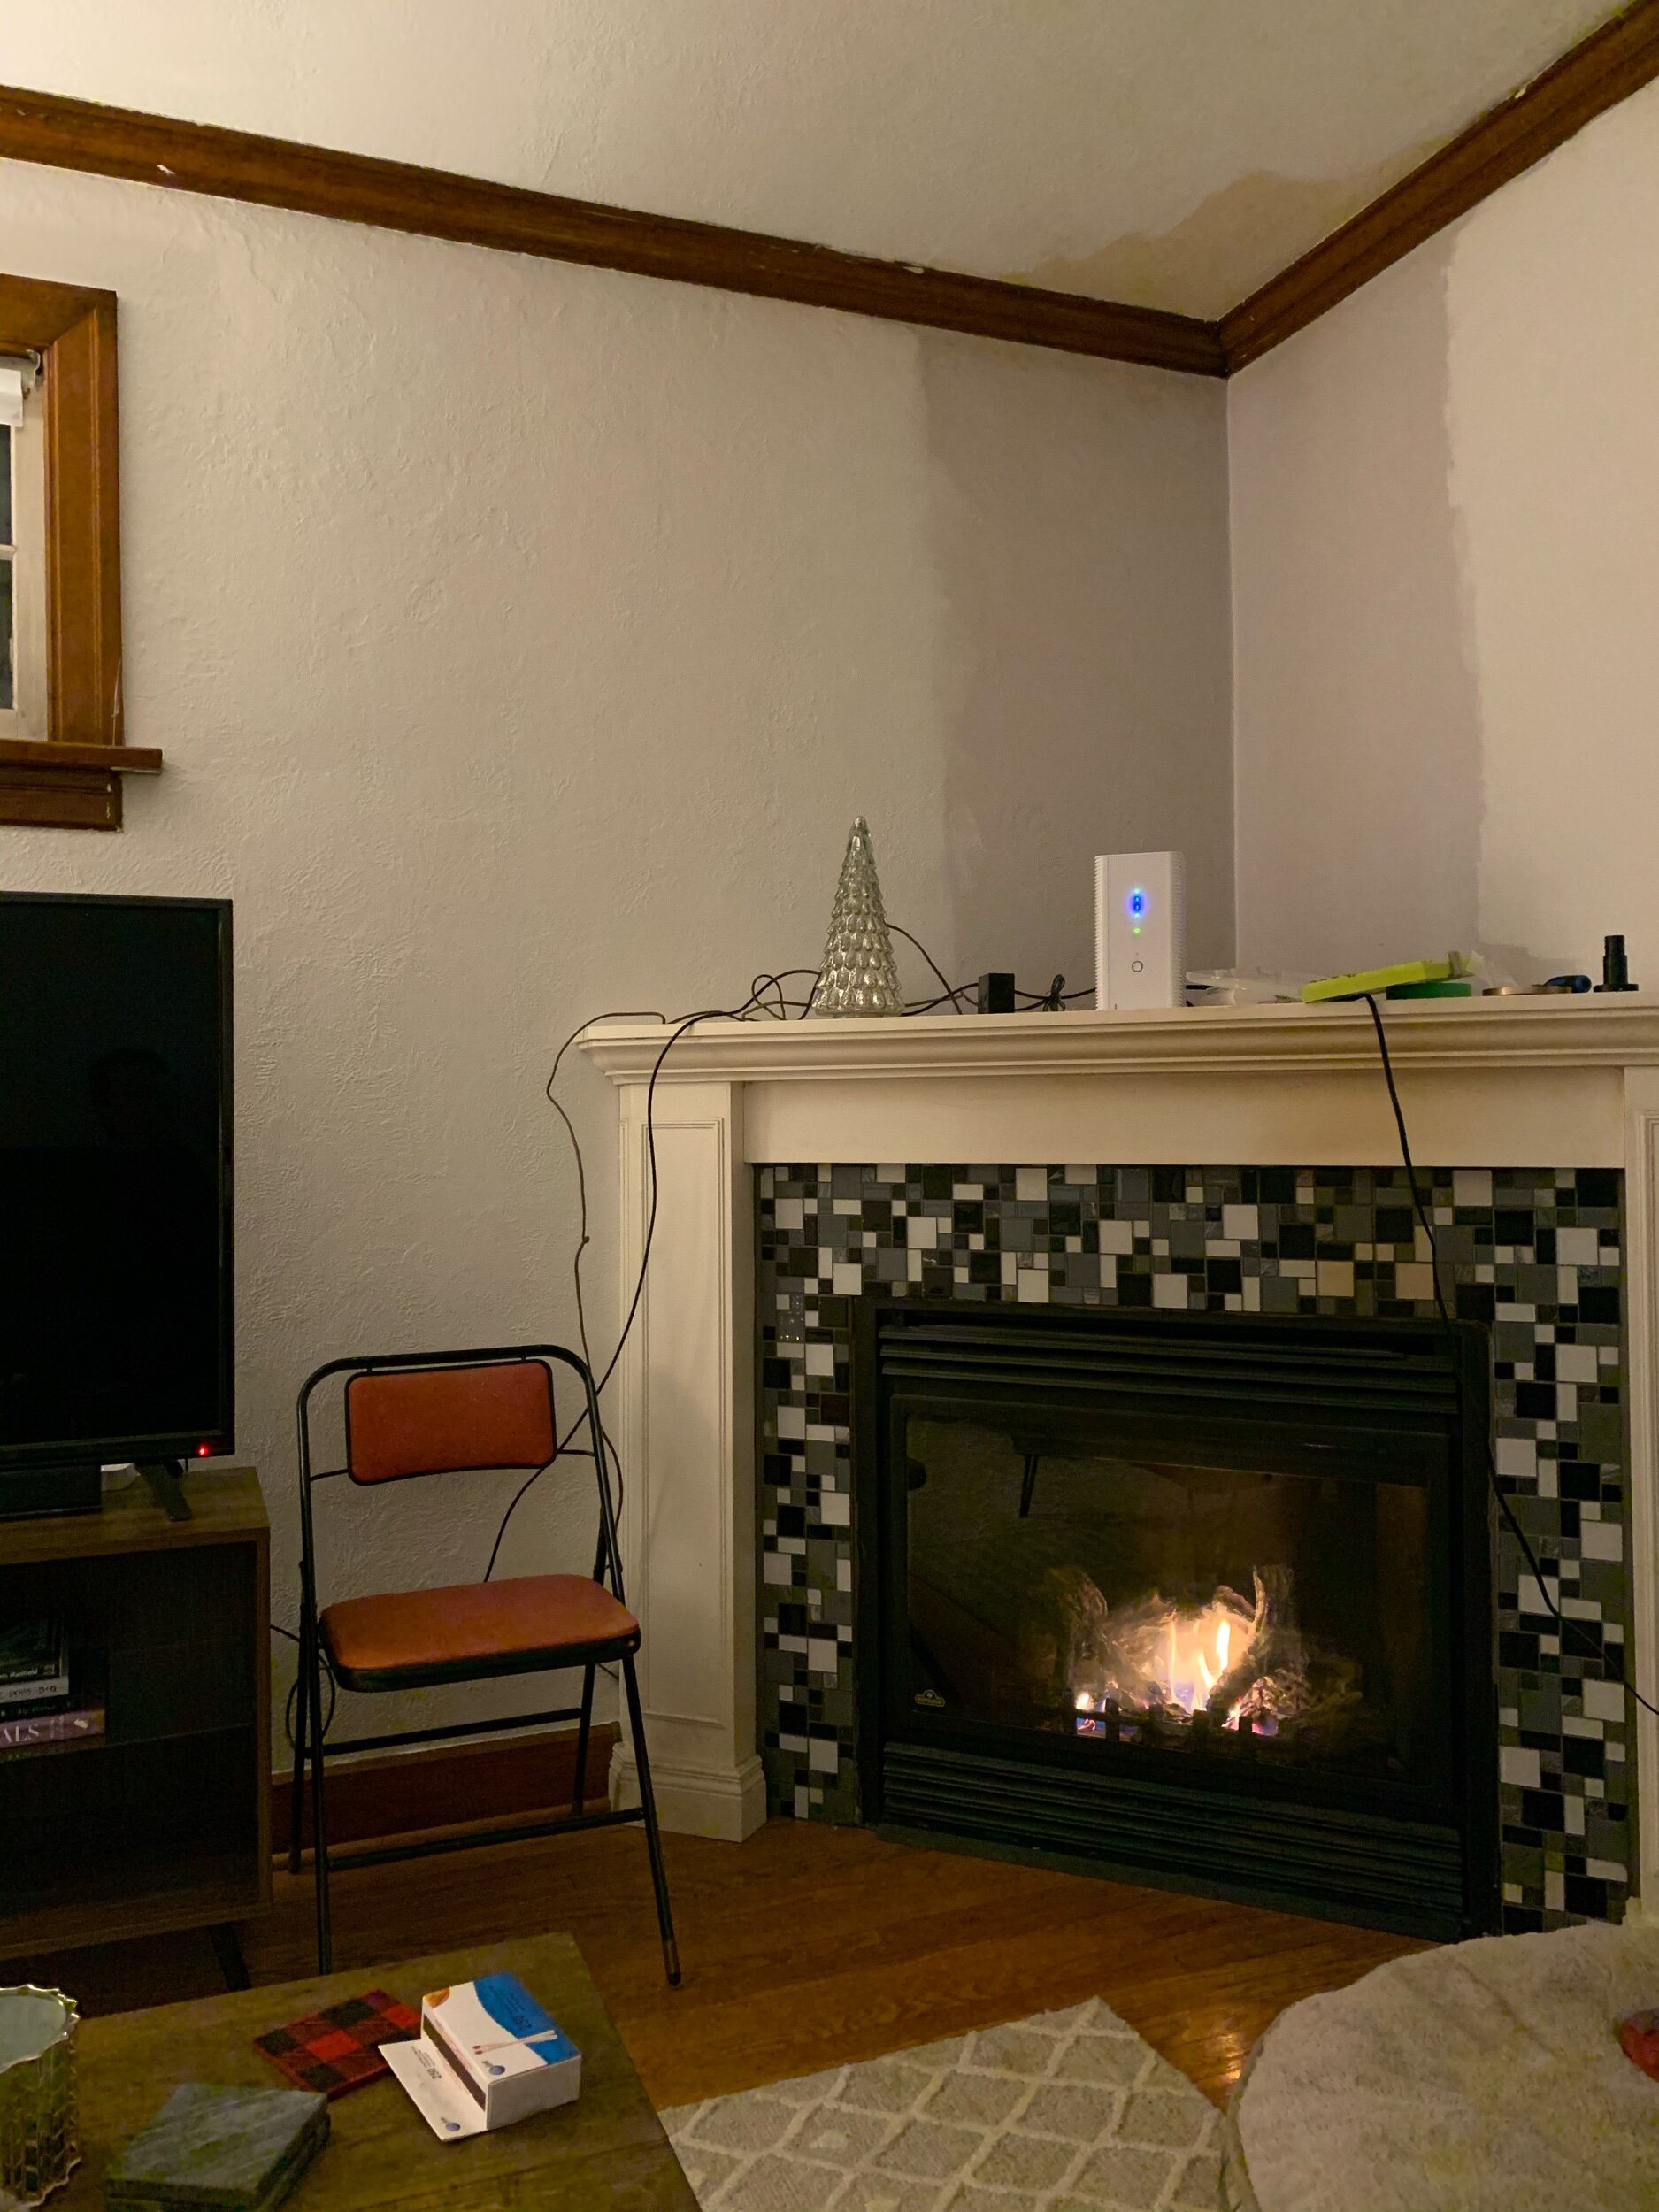
After moving in - notice the paint as far back as we could reach and my sad attempt at Christmas decorating
My biggest issues with it were:
The style - I don’t hate it but it doesn’t match my style or the general aesthetic of the house
The gap at the top - fireplace surrounds should go all the way to the ceiling if they’re not inset into a wall already, this helps create the illusion of a real fireplace with a chimney behind/above it
The hack job wiring - squeezed out the side and plugged in, it looks messy and unsafe
designing a new surround
So I knew I needed to remove the entire surround, stripping it down to only the black metal insert, and start from scratch, but there were a few challenges with designing a new solution.
challenges
I wasn’t going to move the fireplace in the room at all, so it was staying in the corner on a diagonal. For one thing, it’s attached to the floor (which is likely damaged underneath) and the gas line and vent are run directly to it through the basement and exterior wall of the house, so moving it would be an enormous undertaking. But also, there’s really no other spot in this room that makes more sense.
The room is not very big. I didn’t want to do anything that would make the new surround take up more physical or visual space in the room - if anything I wanted to reduce the footprint if I could.
The other walls in the room are heavily textured plaster, so framing out a new surround in smooth drywall (like the stunning examples below) would have been awkward and not matched the rest of the room. Unfortunately pulling all the plaster down and drywalling isn’t in the cards right now.
I might skimcoat the walls or replace with drywall down the line - so I didn’t want to try to match the texture of the plaster walls either.
This all left me with one basic idea - I had to frame out a new surround and give it some kind of finish that wasn’t textured plaster or smooth drywall. It needed to meet the following criteria because of all the other work happening in the house:
quick and affordable
timeless/fits the rest of the home, not just my personal style
makes the fireplace eye-catching without being large and looming
options
I ended up with a few different options. I knew I wanted the surround to go from floor to ceiling, so I decided to frame out a new “chimney” that tucked in at the corners both for visual interest and to decrease the footprint of the fireplace. I also knew that because of the size and placement I wouldn’t be able to build in a set-back mantle like some of the options above, a mantle would have to be added onto the front. I looked at several different finishes.
I considered a brushed stucco, tile, shiplap, and a few varieties of brick. While I love red brick and also saw some really stunning brick painted matte black, I felt both would be too dark for this small room since they’d be running from floor to ceiling. In the end, I decided I liked the look of white painted brick best, and since I’d be painting it all white that I could get away with using textured faux brick panels.
I did look into brick veneer: thin, real bricks you apply with mortar, but was unable to find any I could get in Canada for a reasonable price. That also would have taken quite a bit more time I honestly didn’t have. It’s a beautiful look though, check out Grace van Meurer (Collected Eclectic) who recently bricked out a fireplace in her bedroom with this method!
I bought the panels on sale at Lowe’s so they were affordable and very easy to install. They looked a little fake before painting, but after paint I think they’re pretty convincing. I will say that sometimes faux brick comes in a two-dimensional wall-paper style application so if you’re planning to go this route make sure you get something with three-dimensional texture.
building the new surround
With the plan in place we removed the old surround (which I ended up selling on Facebook Marketplace) and my dad and uncle framed a new surround with 2x4s in the shape I planned.

The old surround was surprisingly easy to remove!
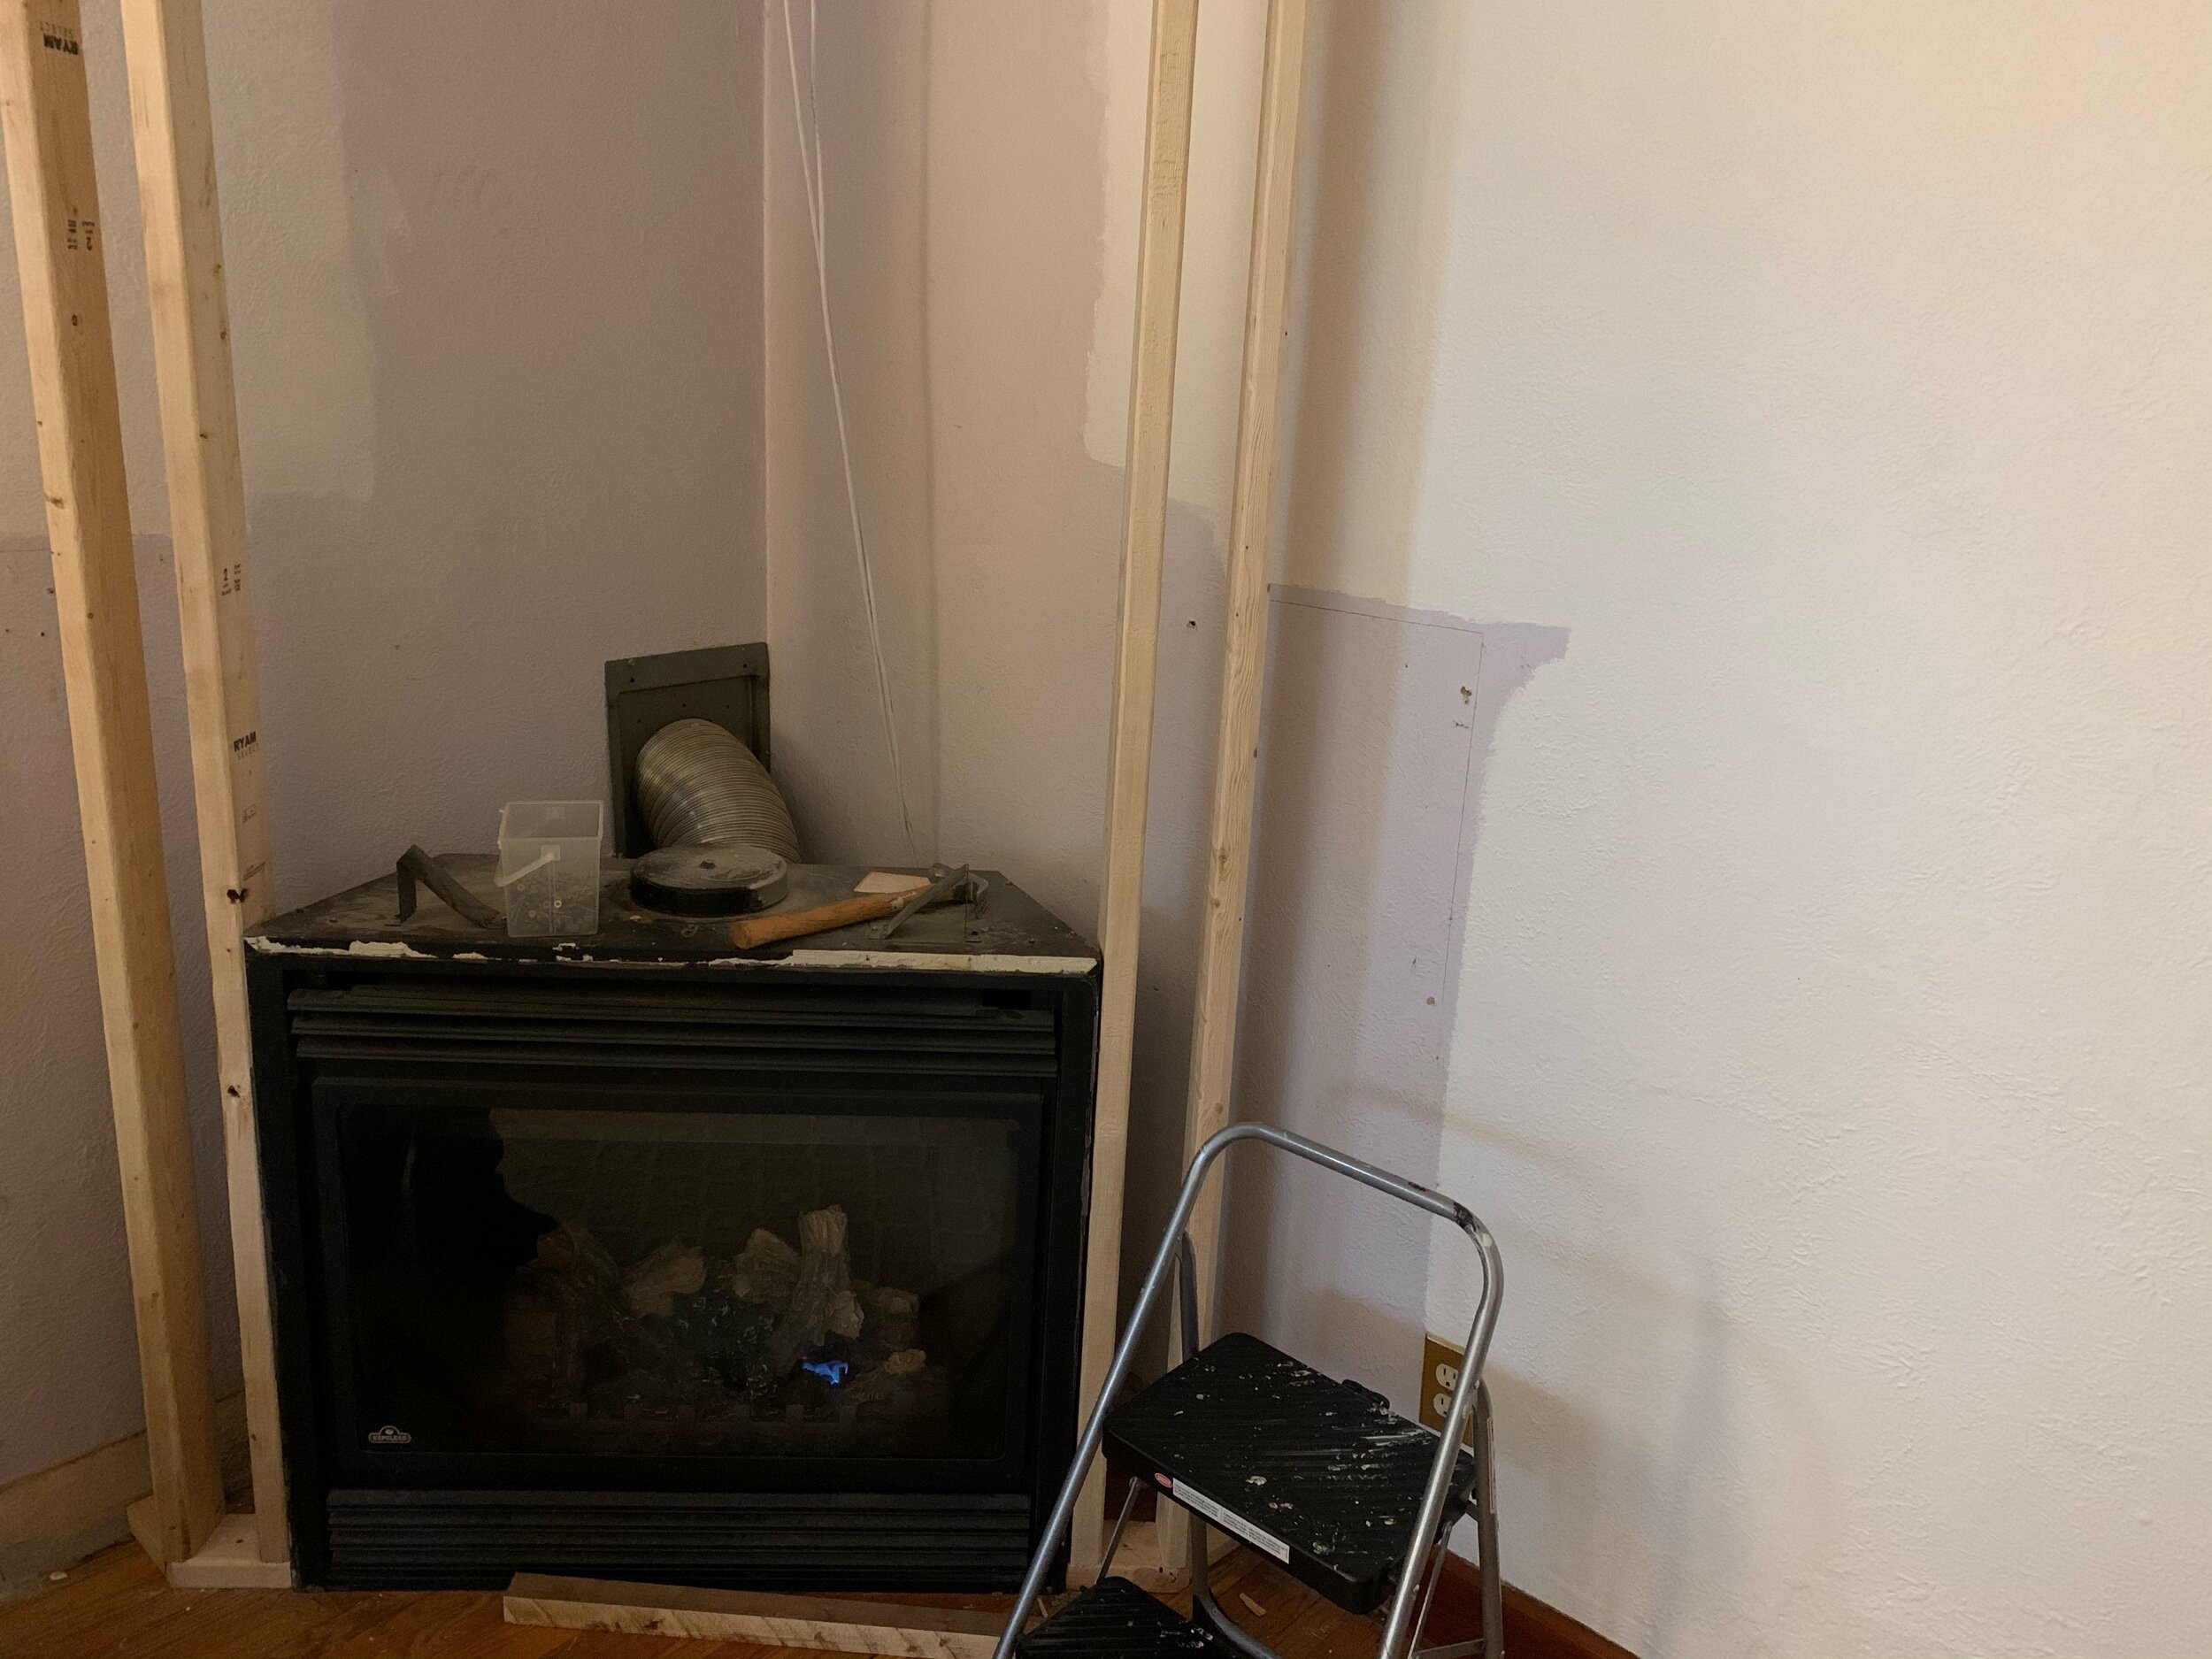
The sides were framed out first to create the shape.

The frame was reinforced in the centre, a safe distance from the top of the firebox as indicated in the manual for the insert.
Once the surround was solidly framed, we cut the faux brick panels to fit, and attached them to the studs using construction adhesive, with small brad nails to hold in place until it dried. The ceilings in this room are 8’4” and the panels are only 8’ tall so I needed to patch in the bottoms with extra pieces, making sure the pattern lined up.

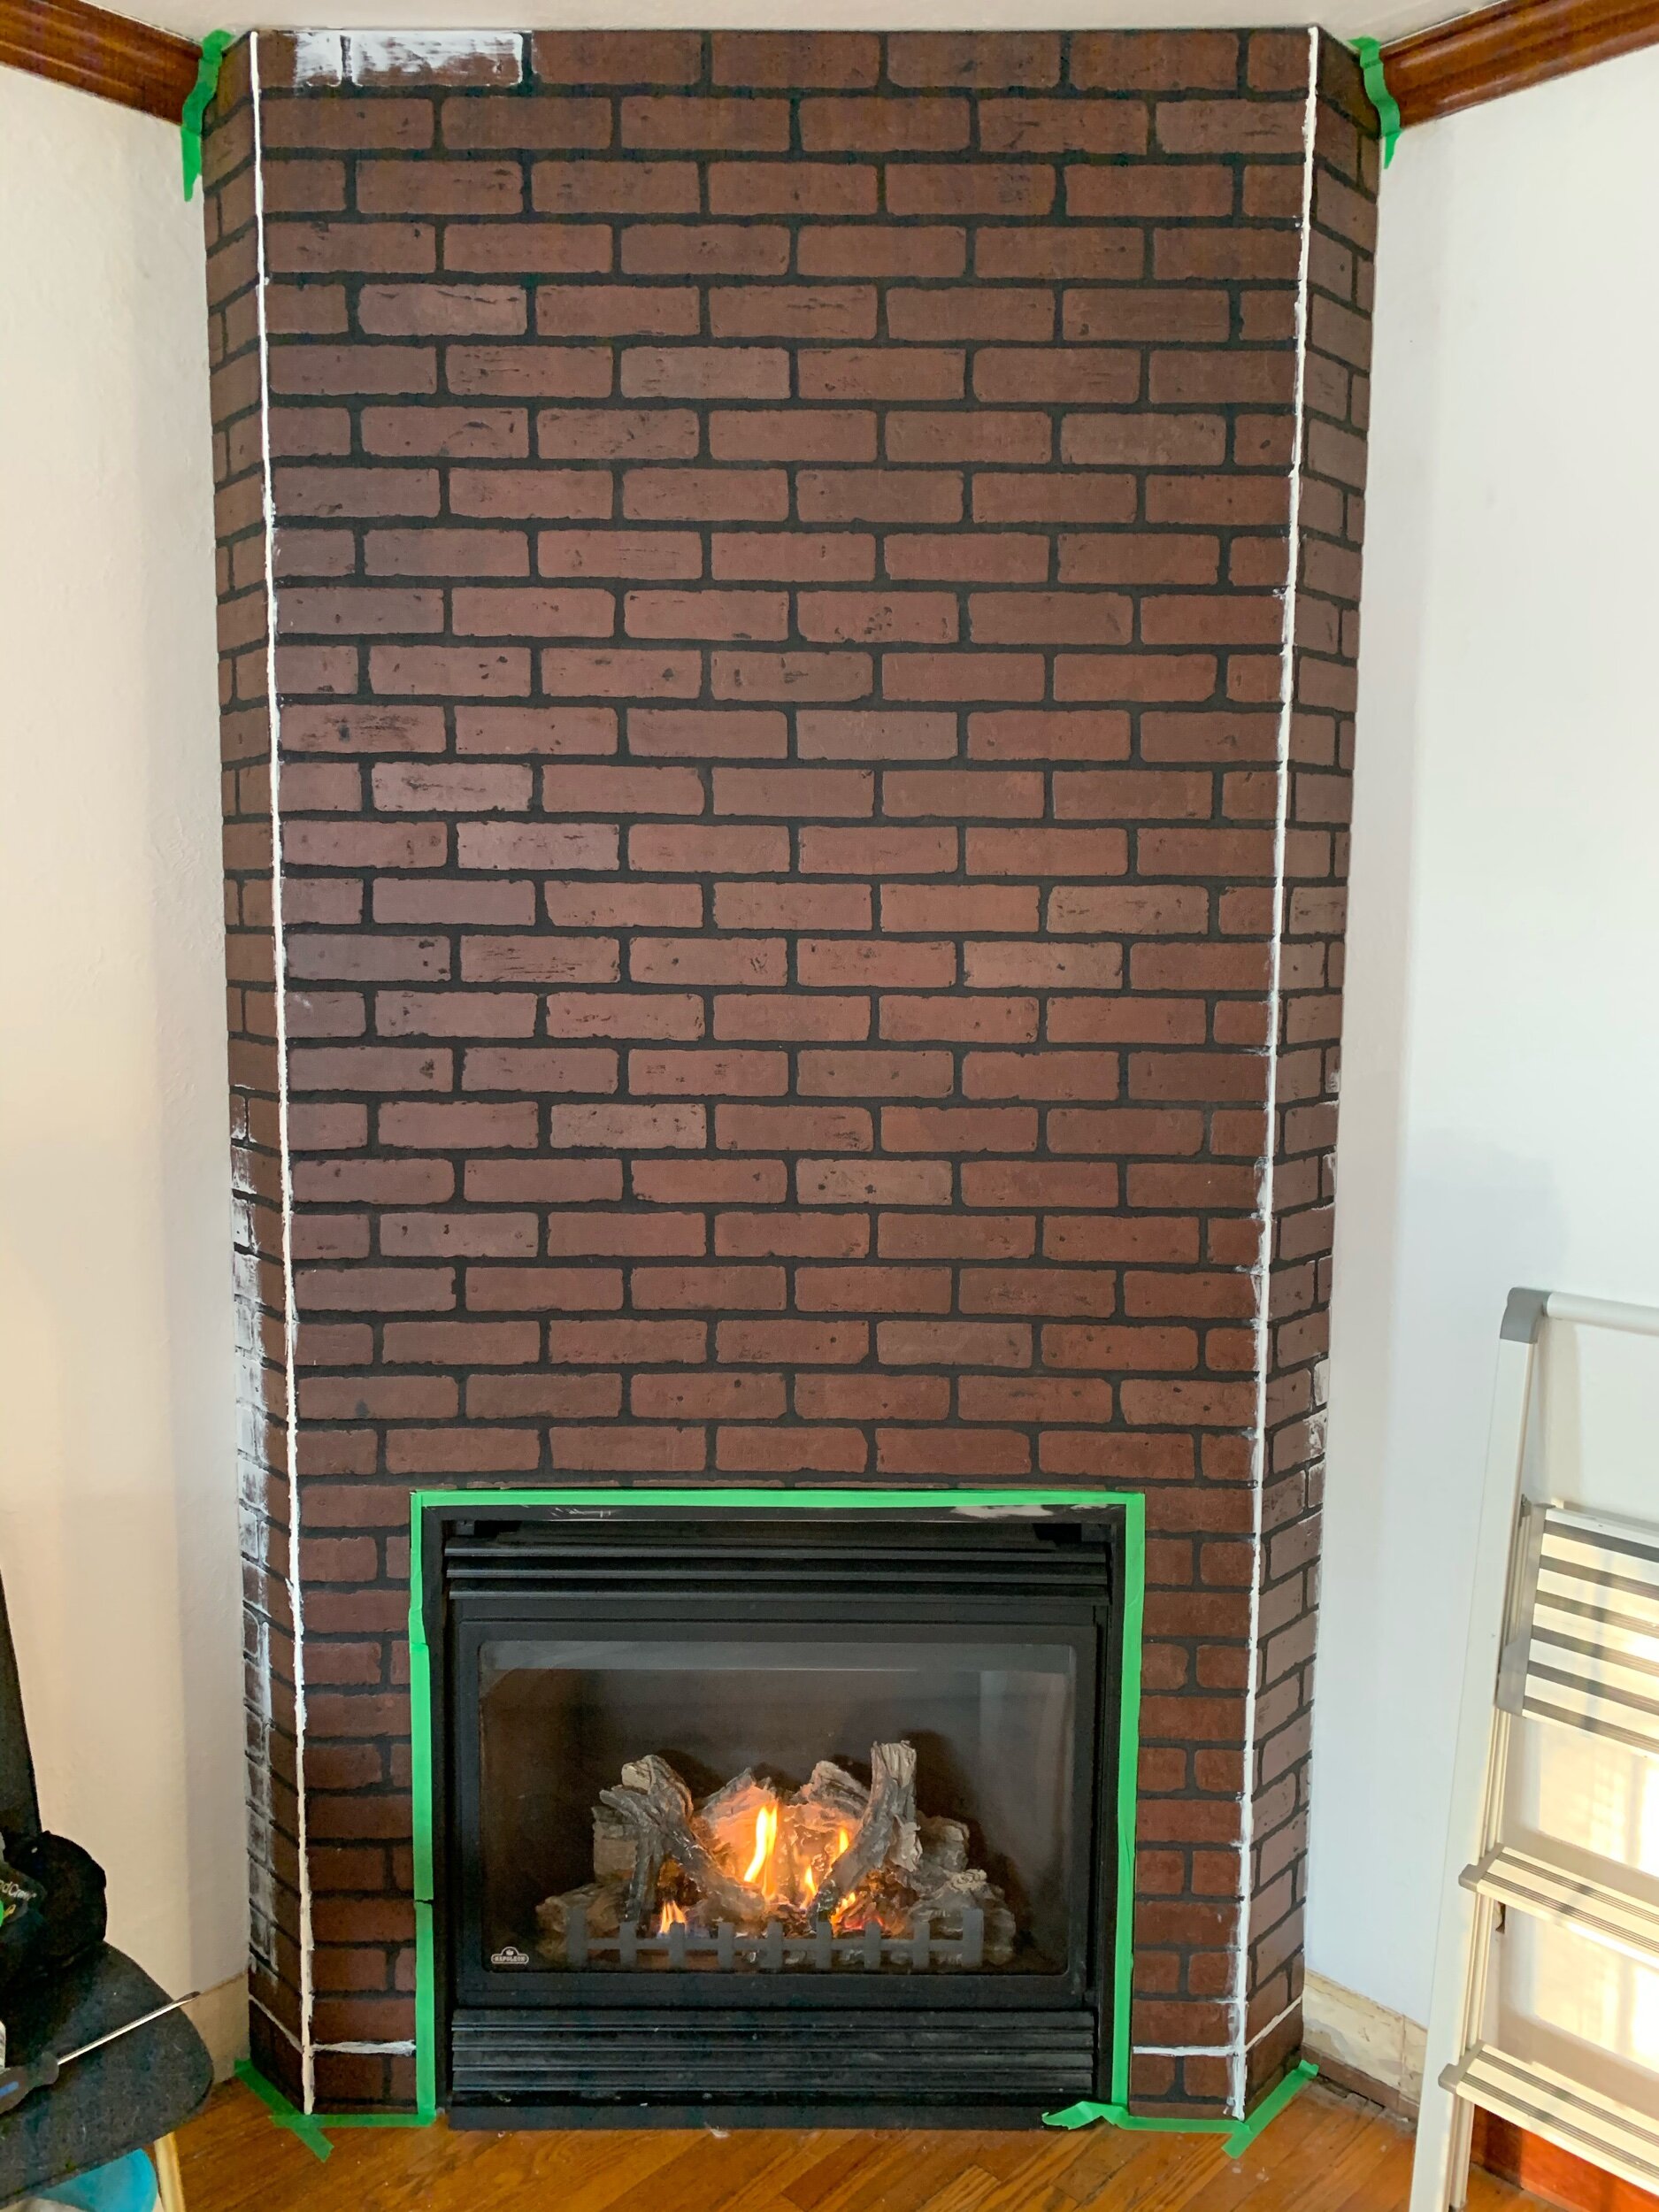

Once this was done I caulked along the seams between panels at the corners, against the wall, and up against the ceiling. I also had to touch up the wall paint on either side and patch in more baseboard because the new footprint is quite a bit smaller than the old one even though the fireplace itself hasn’t moved!
Finally, we painted the whole thing in Valspar’s Swiss Coffee, the same white as the walls. I also touched up the fireplace insert itself using a matte black high-heat paint from Rustoleum. It needs one more coat but the fumes are pretty strong so I’m waiting until we have plans to safely leave the house for a day or two after painting on a second coat.
budget breakdown
Faux Brick Panels (I bought two of these when there was a 20% off sale) - $144
2 x 4s - $25
High Heat Fireplace Paint - $10.70
Paint (Valspar Swiss Coffee in Eggshell) - already had on hand
Caulking - already had on hand
The whole surround build is saved under the fireplace highlight on my Instagram if you’re interested in more detail!


With the surround done I thought the fireplace would look smaller but actually I think the room just looks larger! The scale is much better for the space, so that the fireplace looks substantial and great on it’s own but also isn’t the only thing you see in the room. Next up is to build an install a mantle in a warm wood tone so I’ll have space to decorate and hang stockings at Christmas - truly my biggest motivator for putting together a fireplace!
I’ll see you back next week with more progress, in the meantime go check out all the other awesome projects underway on the One Room Challenge blog!


