Dining Room Before & After
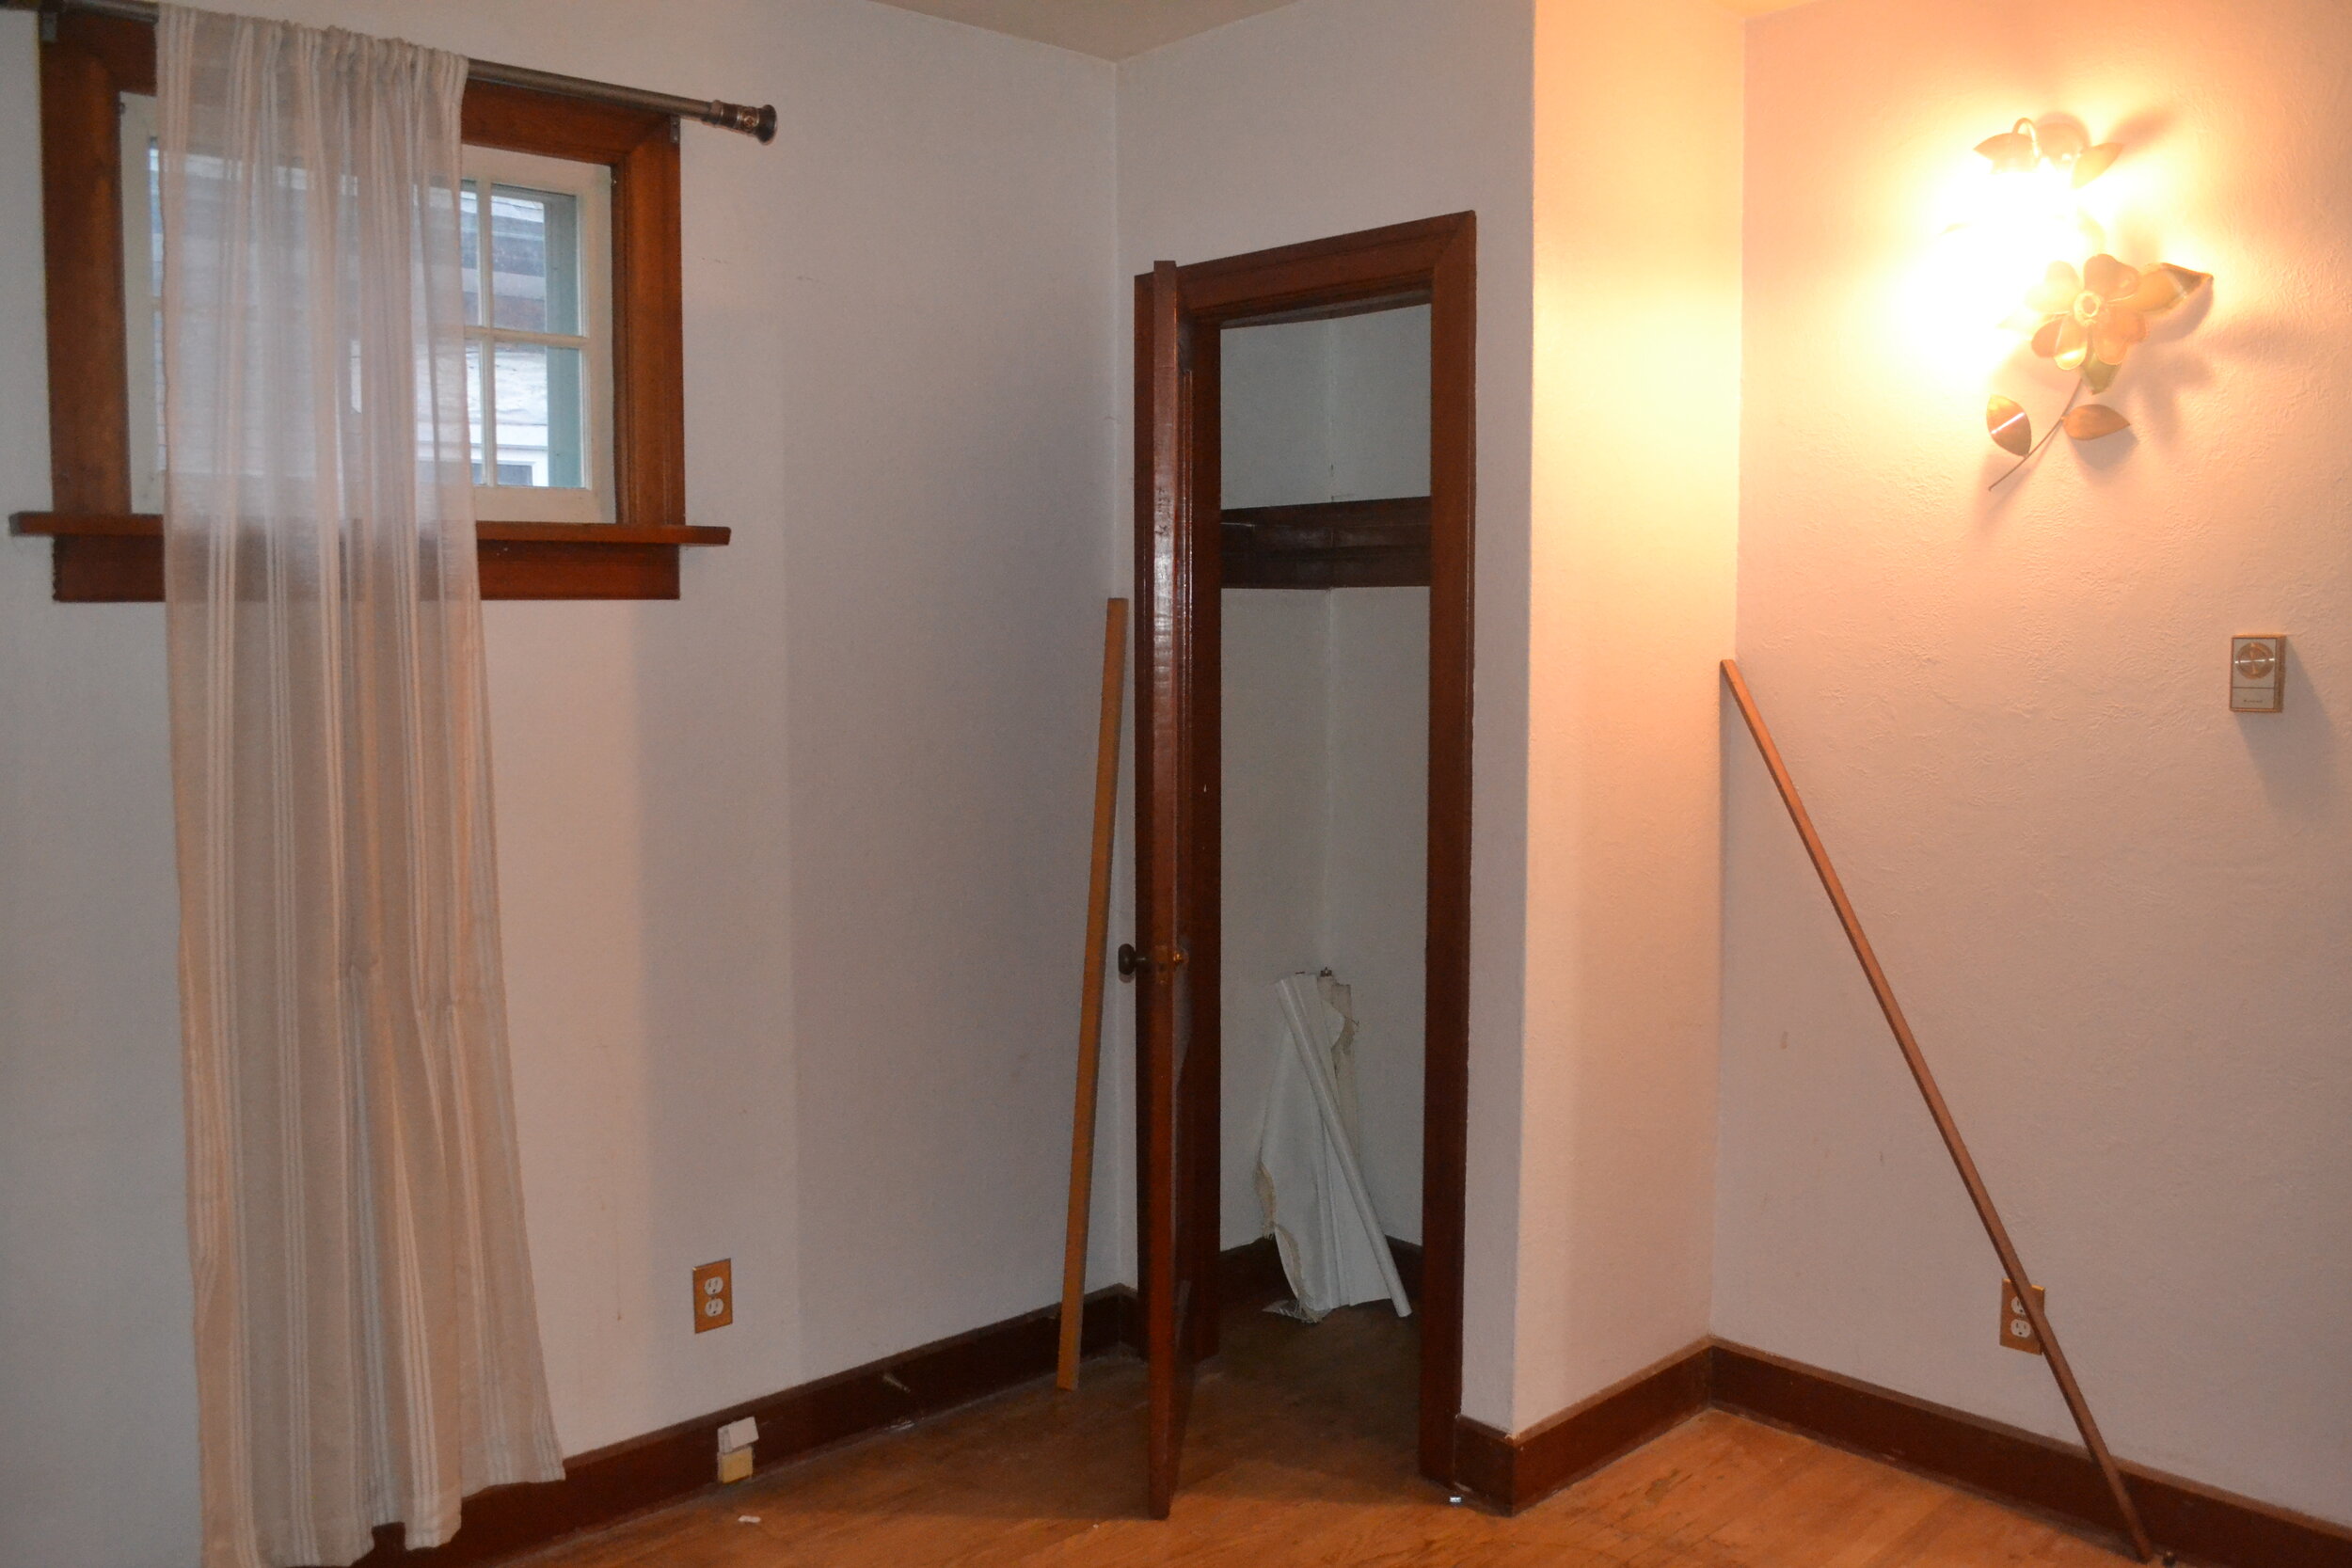
For the first two and a half months we had the house, the two main floor bedrooms were not used except for storage. They held extra tools, a mattress and box spring, packed boxes, lumber and faux brick for the fireplace (coming to the blog soon!), and 25 gallons of paint and primer. I tried not to look at them and we generally pretended they weren’t there. But we had decided to host a New Year’s Eve party and in a house this small we needed the extra room - so we painted, primed, and half-furnished the room between December 29th and December 31st at about 7pm when everyone arrived. The rest of the room has been an ongoing process since then.
Before & After

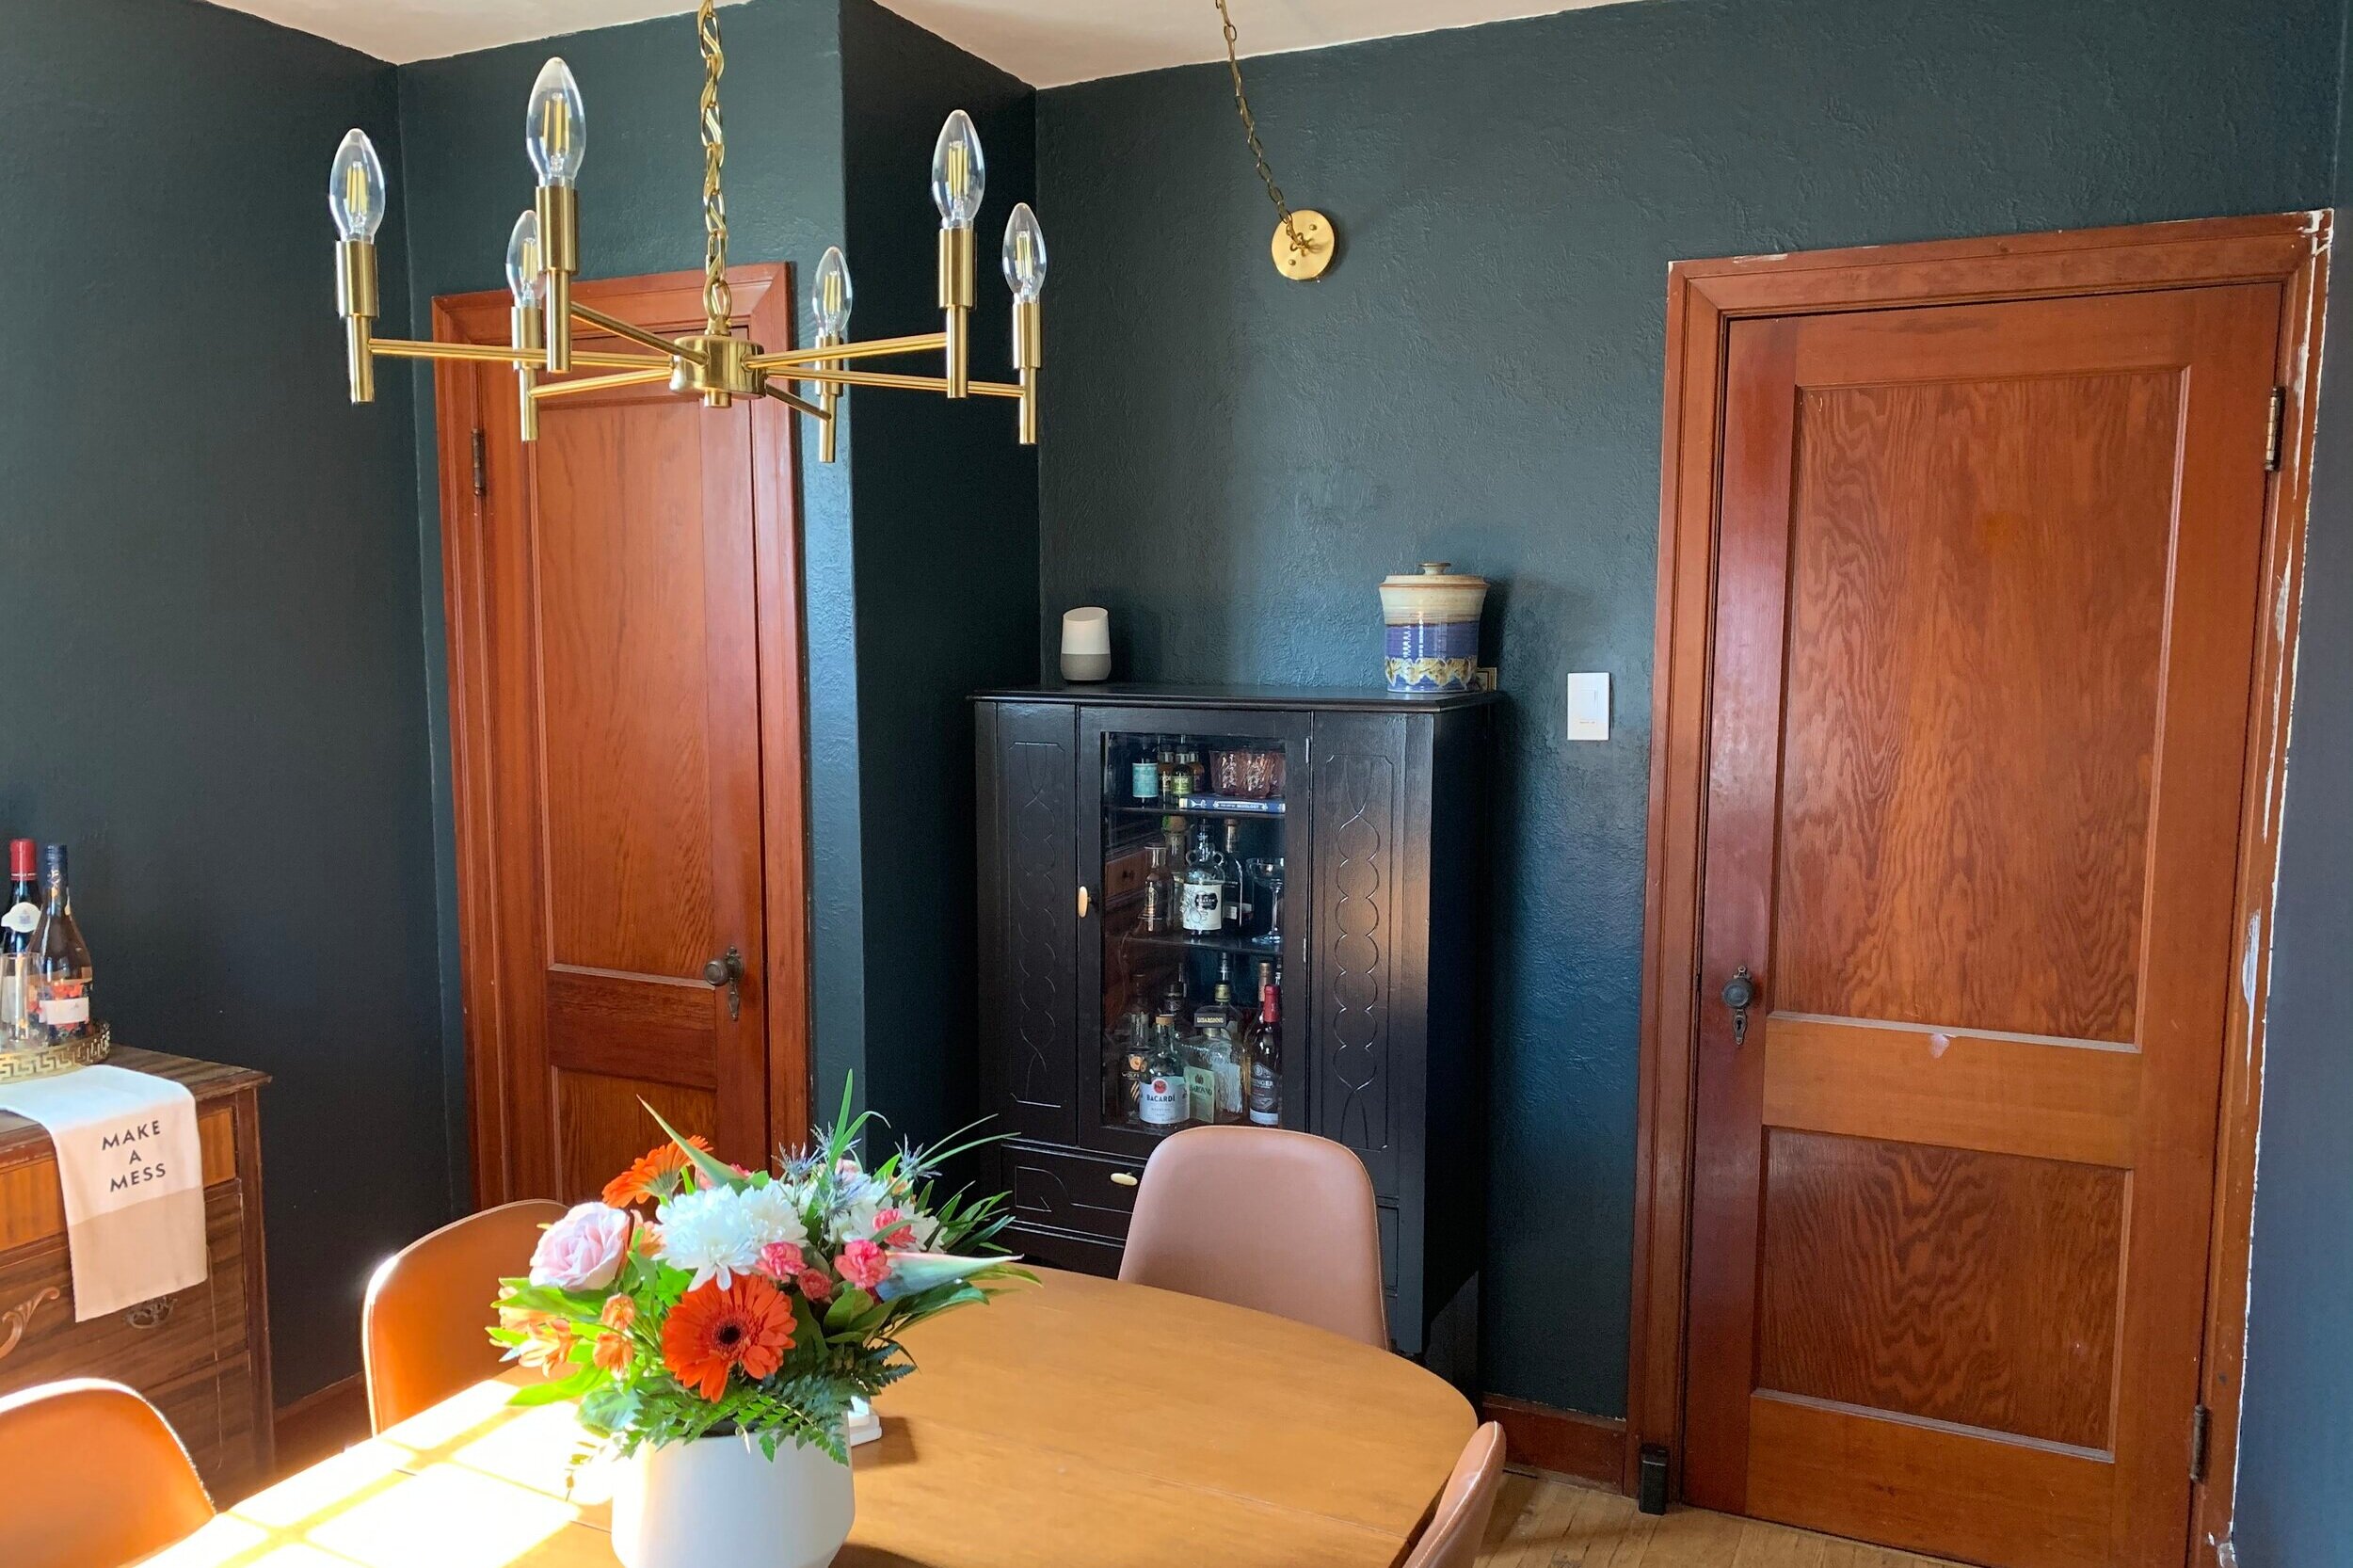
Having a dining room was one of the things I was most excited about in the house. I love that we have separate rooms and can decorate each one, and since most of the house was going to be painted white, I was excited to do something bold in here. Like most of the rest of the house, the first thing we did in the dining room was to clean it out and wash the walls with TSP before priming and painting. We chose Valspar’s Black Evergreen for the walls which is a deep, moody green that I absolutely love. For the ceilings we went with the same Swiss Coffee white I used in the rest of the house.


Furniture
Without a doubt my favourite thing in this room is the stunning mid-century modern table. It’s gorgeous oval shape, sleek legs with gold caps, and multiple leaves make it literally the best table I’ve ever seen. I feel so incredibly fortunate to have inherited this table from my late grandmother, who had it refinished about 15 years ago. My mom remembers tons of large family dinners around this table growing up and I’m so happy to keep it in the family. The table has drop leaves on either side and two leaves for the centre so that it seats 10 when fully extended. We leave it normally with the drop-leaves up but additional leaves out, seating 6.

We got these simple faux-leather chairs from JYSK for a great price, they’re actually the first thing we bought after I signed the paperwork for the house! I like that they’re comfortable and low profile. I think they match the rest of the room without overpowering anything else.
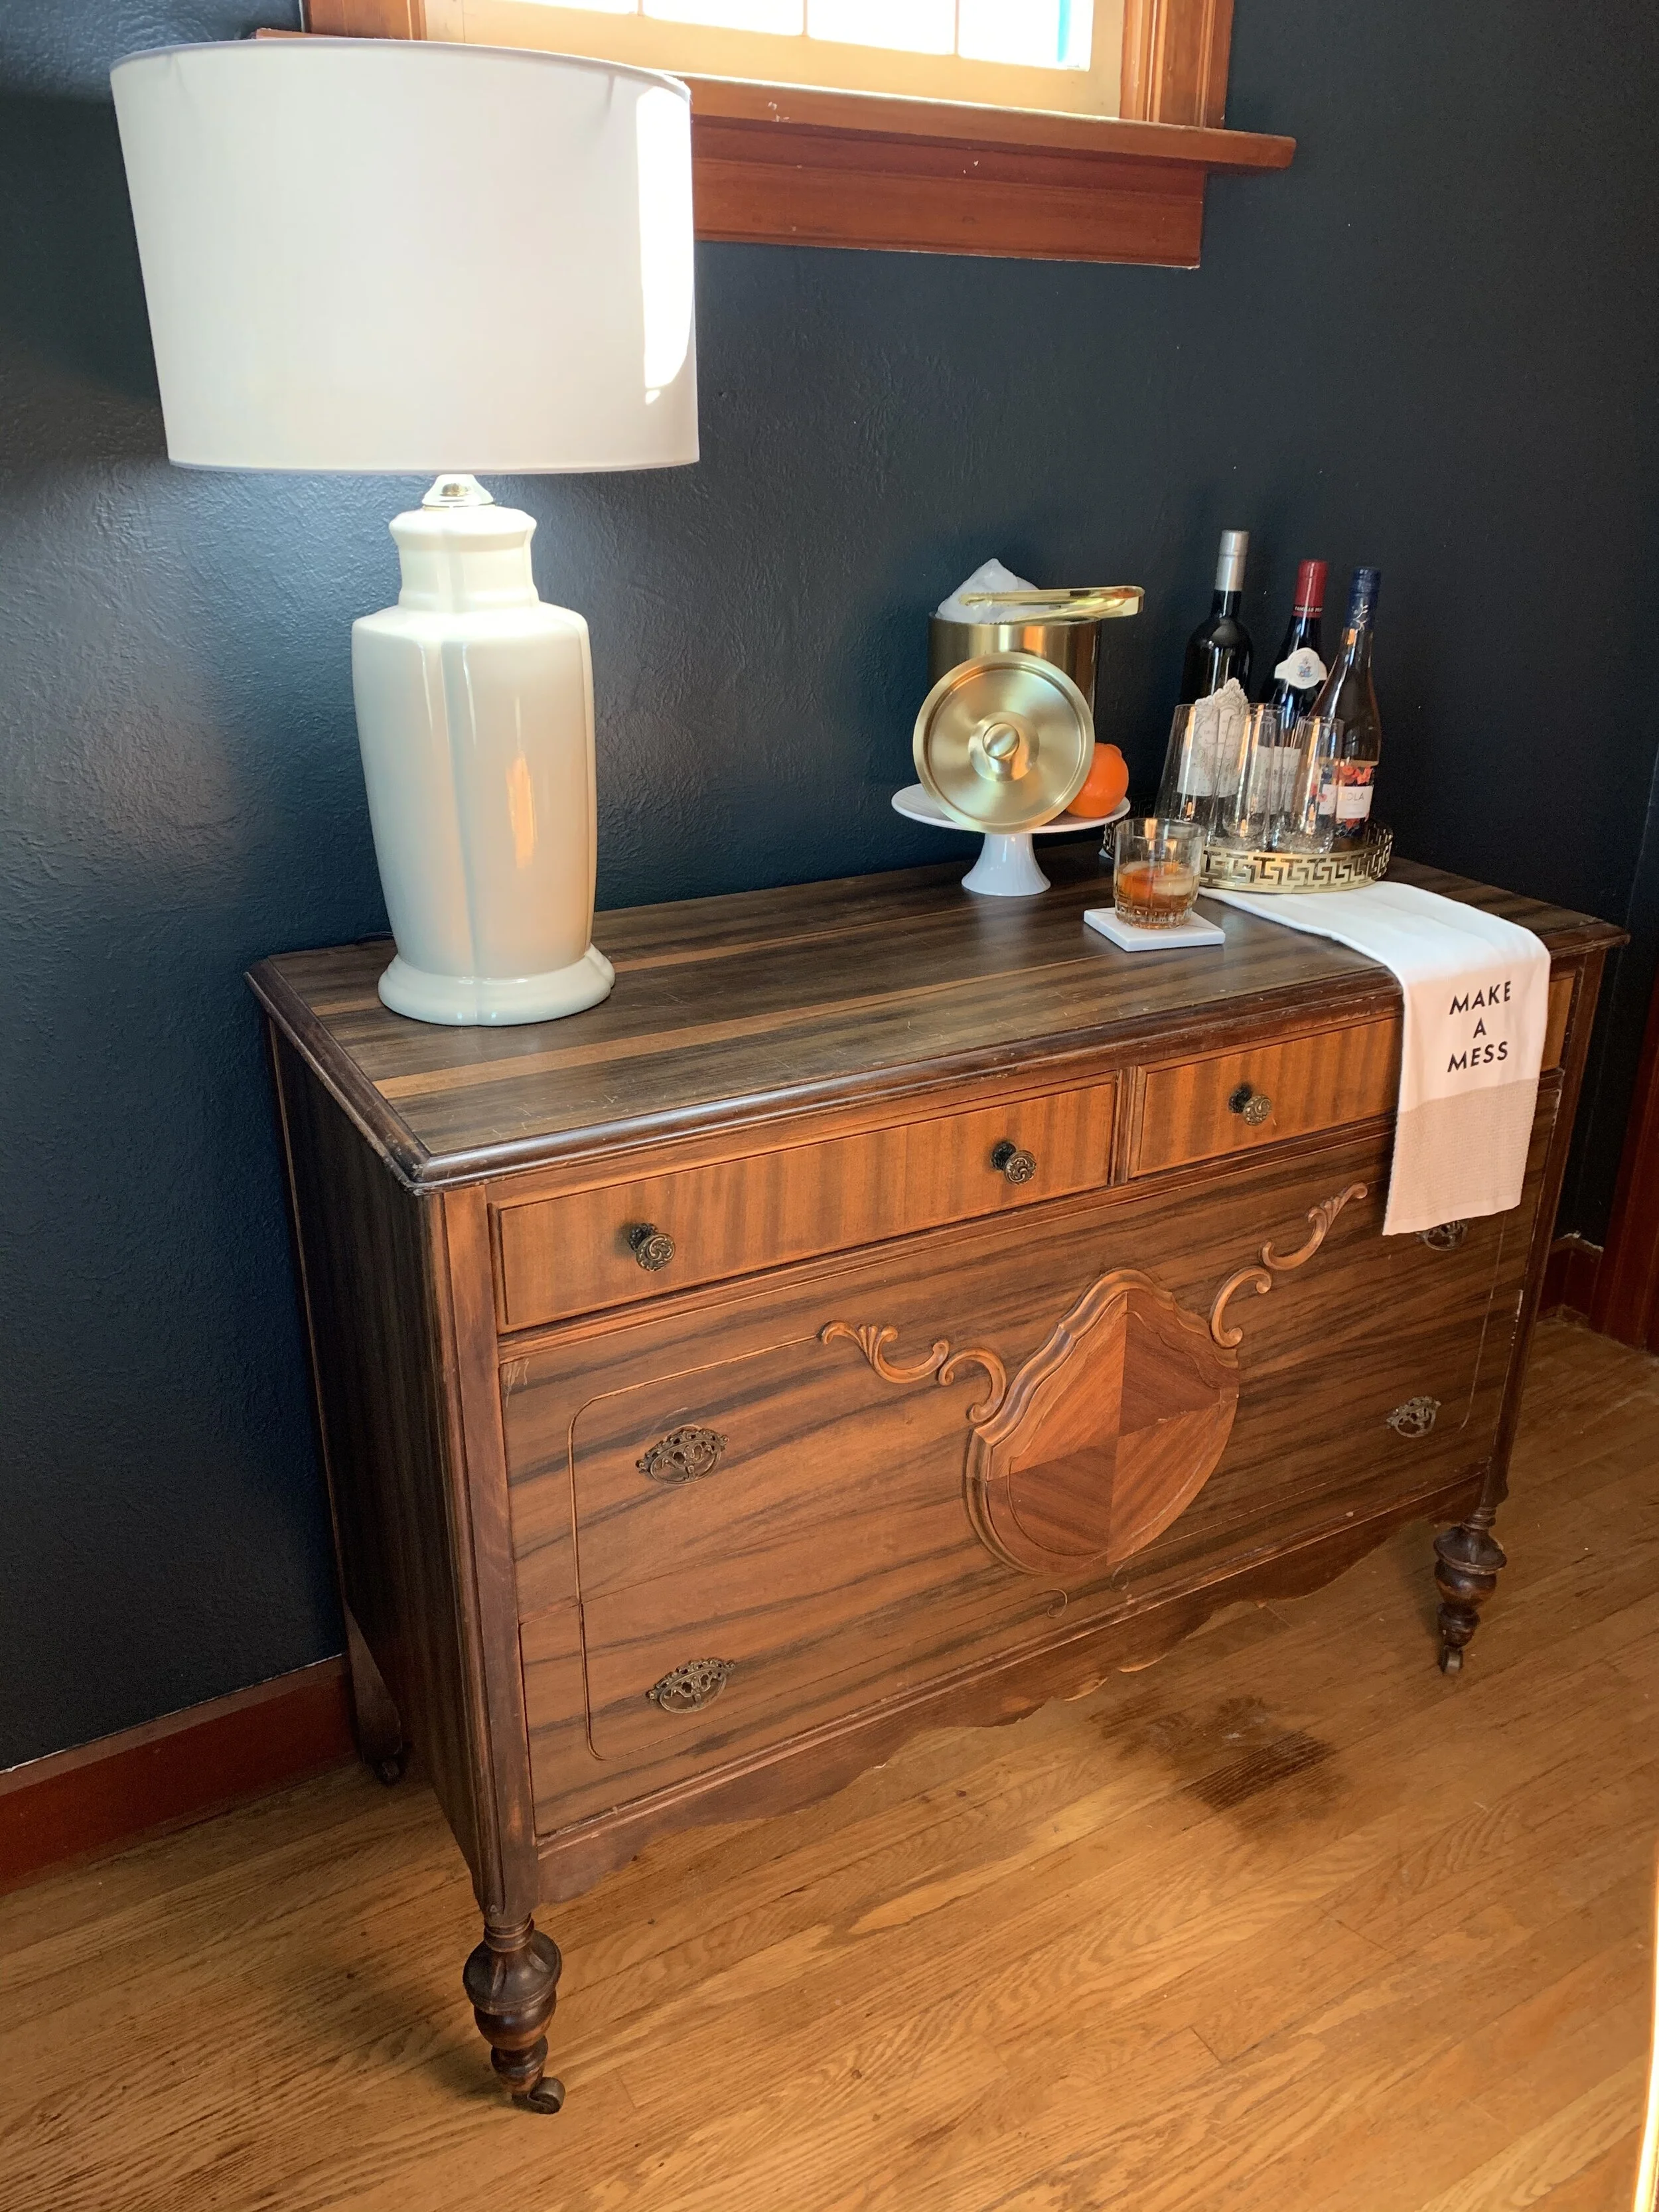
The buffet/sideboard is an antique dresser I bought a few years ago that I’d always planned to use as a dining room buffet. I’m so happy it’s finally in its home. It stores board games, seasonal dishes, and other miscellaneous things. I definitely need to get a little better at styling it, but it’s nice to have so much space for food and drinks when we’re entertaining!
Chandelier
Finding an affordable chandelier for this room was a lot harder than I thought it would be! I went to tons of lighting and big box stores as well as thrift stores but couldn’t find anything big enough that suited the room and my budget - I honestly had no idea how expensive chandeliers were! Eventually Facebook led me to Studio Sinka Lighting who had my chandelier for under $200 and are local so we were able to go pick it up!

Since this room originally had only a wall sconce (one of many fascinating choices by a previous owner), and since I didn’t have time to open up the wall and ceiling to move the electrical box, I needed to swag out the chandelier from the wall up to the ceiling and down. Most chandeliers don’t come with the 9 foot long cord and chain I needed so I actually rewired this one!
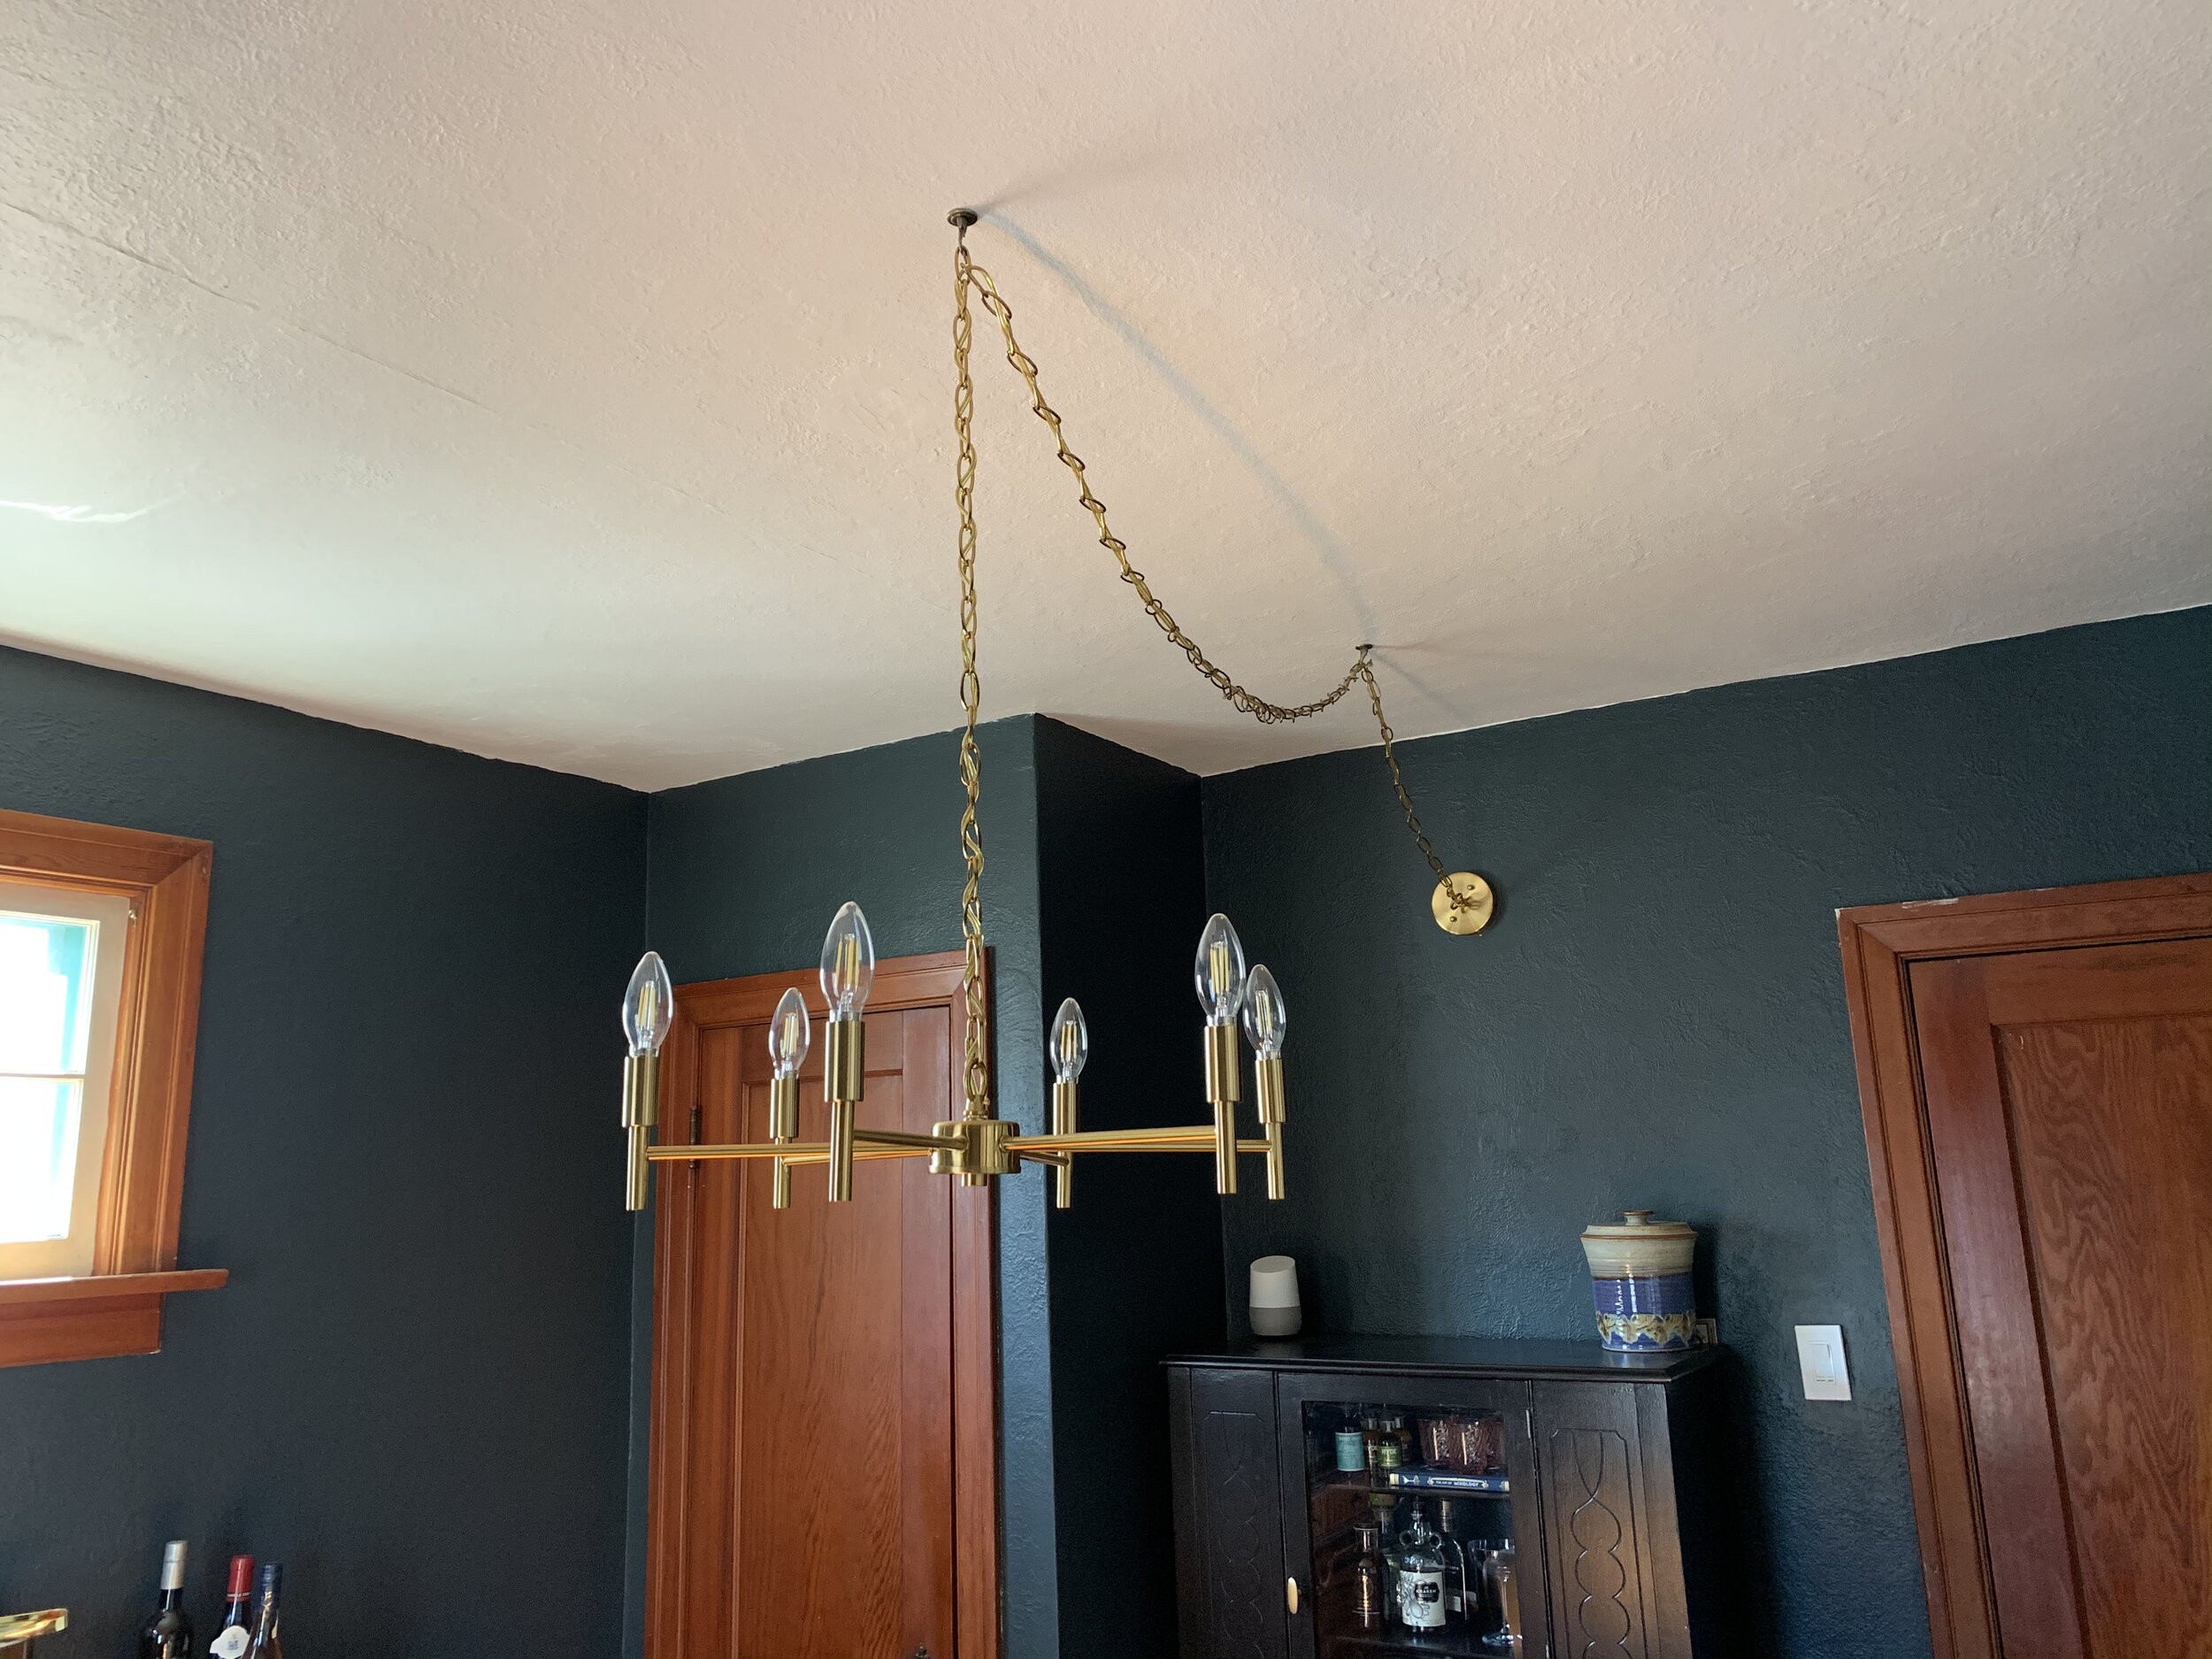
I’ve never rewired a light before but it was actually really simple! I bought a new, longer length of gold lamp cord from the hardware store along with two extra lengths of gold chain that were an almost-identical match for what I already had. I opened up the inside of the chandelier, detached the existing cord, reattached the new one, and threaded it all through the chain. If that sounds easy, it’s because it was! I hung two hooks on the ceiling using toggle anchors, and installed the new light fixture! I also installed a dimmer switch (just following the instructions that came with it) which was the best choice we made as we can now have super bright “daylight” for projects or games, or a softer light for dinner and drinks!
Liquor Cabinet

We moved the table, chairs and buffet into the space on New Year’s Eve and said we’d decide if the room needed anything else later. Then we went to unpack our bar and I got the idea for a liquor cabinet. When we moved in together we both had pretty extensive bars so we thought it would be fun to bring in a way to display everything and have it on hand.
I was so inspired by this gorgeous cabinet Kelly Beall painted glossy black that I started looking for something similar. I found a nearly identical one on Facebook Marketplace that had already been painted so Ryan and I sanded it down and repainted it black. I replaced the wooden knob and pull with three new brass pulls from CB2 ($3 each!). Styling it, again not my strong suit, is taking some time but it’s definitely inspiring us to make more cocktails!
Decor

I was on the hunt for a not-too-modern lamp that was oversized and had clean lines and I had been hunting my local Value Villages for weeks with no luck. Then Maria over at Modern Thrift Co. tipped me off to this amazing lamp at my local store which I definitely would have missed otherwise! The colour was actually a pretty neutral but I felt like the room needed something brighter so I spray painted it a creamy off-white and picked up a white shade from Home Sense. I think it’s perfect for the space!
The blank wall felt so overwhelming to fill (much like all the other walls in this house. I love a closed concept house with rooms but it means SO many walls to fill) until I saw this awesome grid-style gallery wall in Jenni Yolo of I SPY DIY’s recent bedroom makeover. I was also super inspired by Bless’er Home’s botanical gallery wall which is stunning and changes seasonally (stay tuned)! I framed prints from the Biodiversity Heritage Library’s online public domain library in IKEA frames.

A lot of the other small decor pieces were collected over time. The perfect gold ice bucket and dish towel are from my sister, and the gorgeous piece of pottery is from our friends Julie (of Lavender Julep!) and Brian! It won’t get to sit there forever because it’s a Rumtopf which means we get to fill it with berries and rum and make something delicious, at which point I’ll have to move it somewhere cooler. For now though, I just love looking at it!

Budget Breakdown
General
Paint - 1 Gallon Valspar Ultra Eggshell in Black Evergreen - $30
Primer & Ceiling Paint - used a small amount of my 5 gallon buckets from the rest of the house - $20
Emelia Chandelier from Studio Sinka Lighting - $150
Chandelier Supplies & Bulbs - $30
Replacement Outlets - $6
Blinds - $14
Furniture
Dining Table (heirloom)
Buffet (Kijiji)
JONSTRUP Dining Chairs in Cognac & Oak - $300
Liquor Cabinet (Facebook Marketplace) - $70
Paint for Liquor Cabinet - Valspar Ultra High Gloss in SICO’s Grand Piano - $18
Quinn Woven Rug - $100
Decor

Lamp (Value Village) - $10
Spray Paint for Lamp - $8
Lampshade (Home Sense) - $17
Frames - $153
Botanical Prints
Ice Bucket
Dish Towel
Tray (Home Sense)
Champagne Flutes (The Bay)
Total: $926