


Bathroom Demo & Walls | One Room Challenge: Week Two
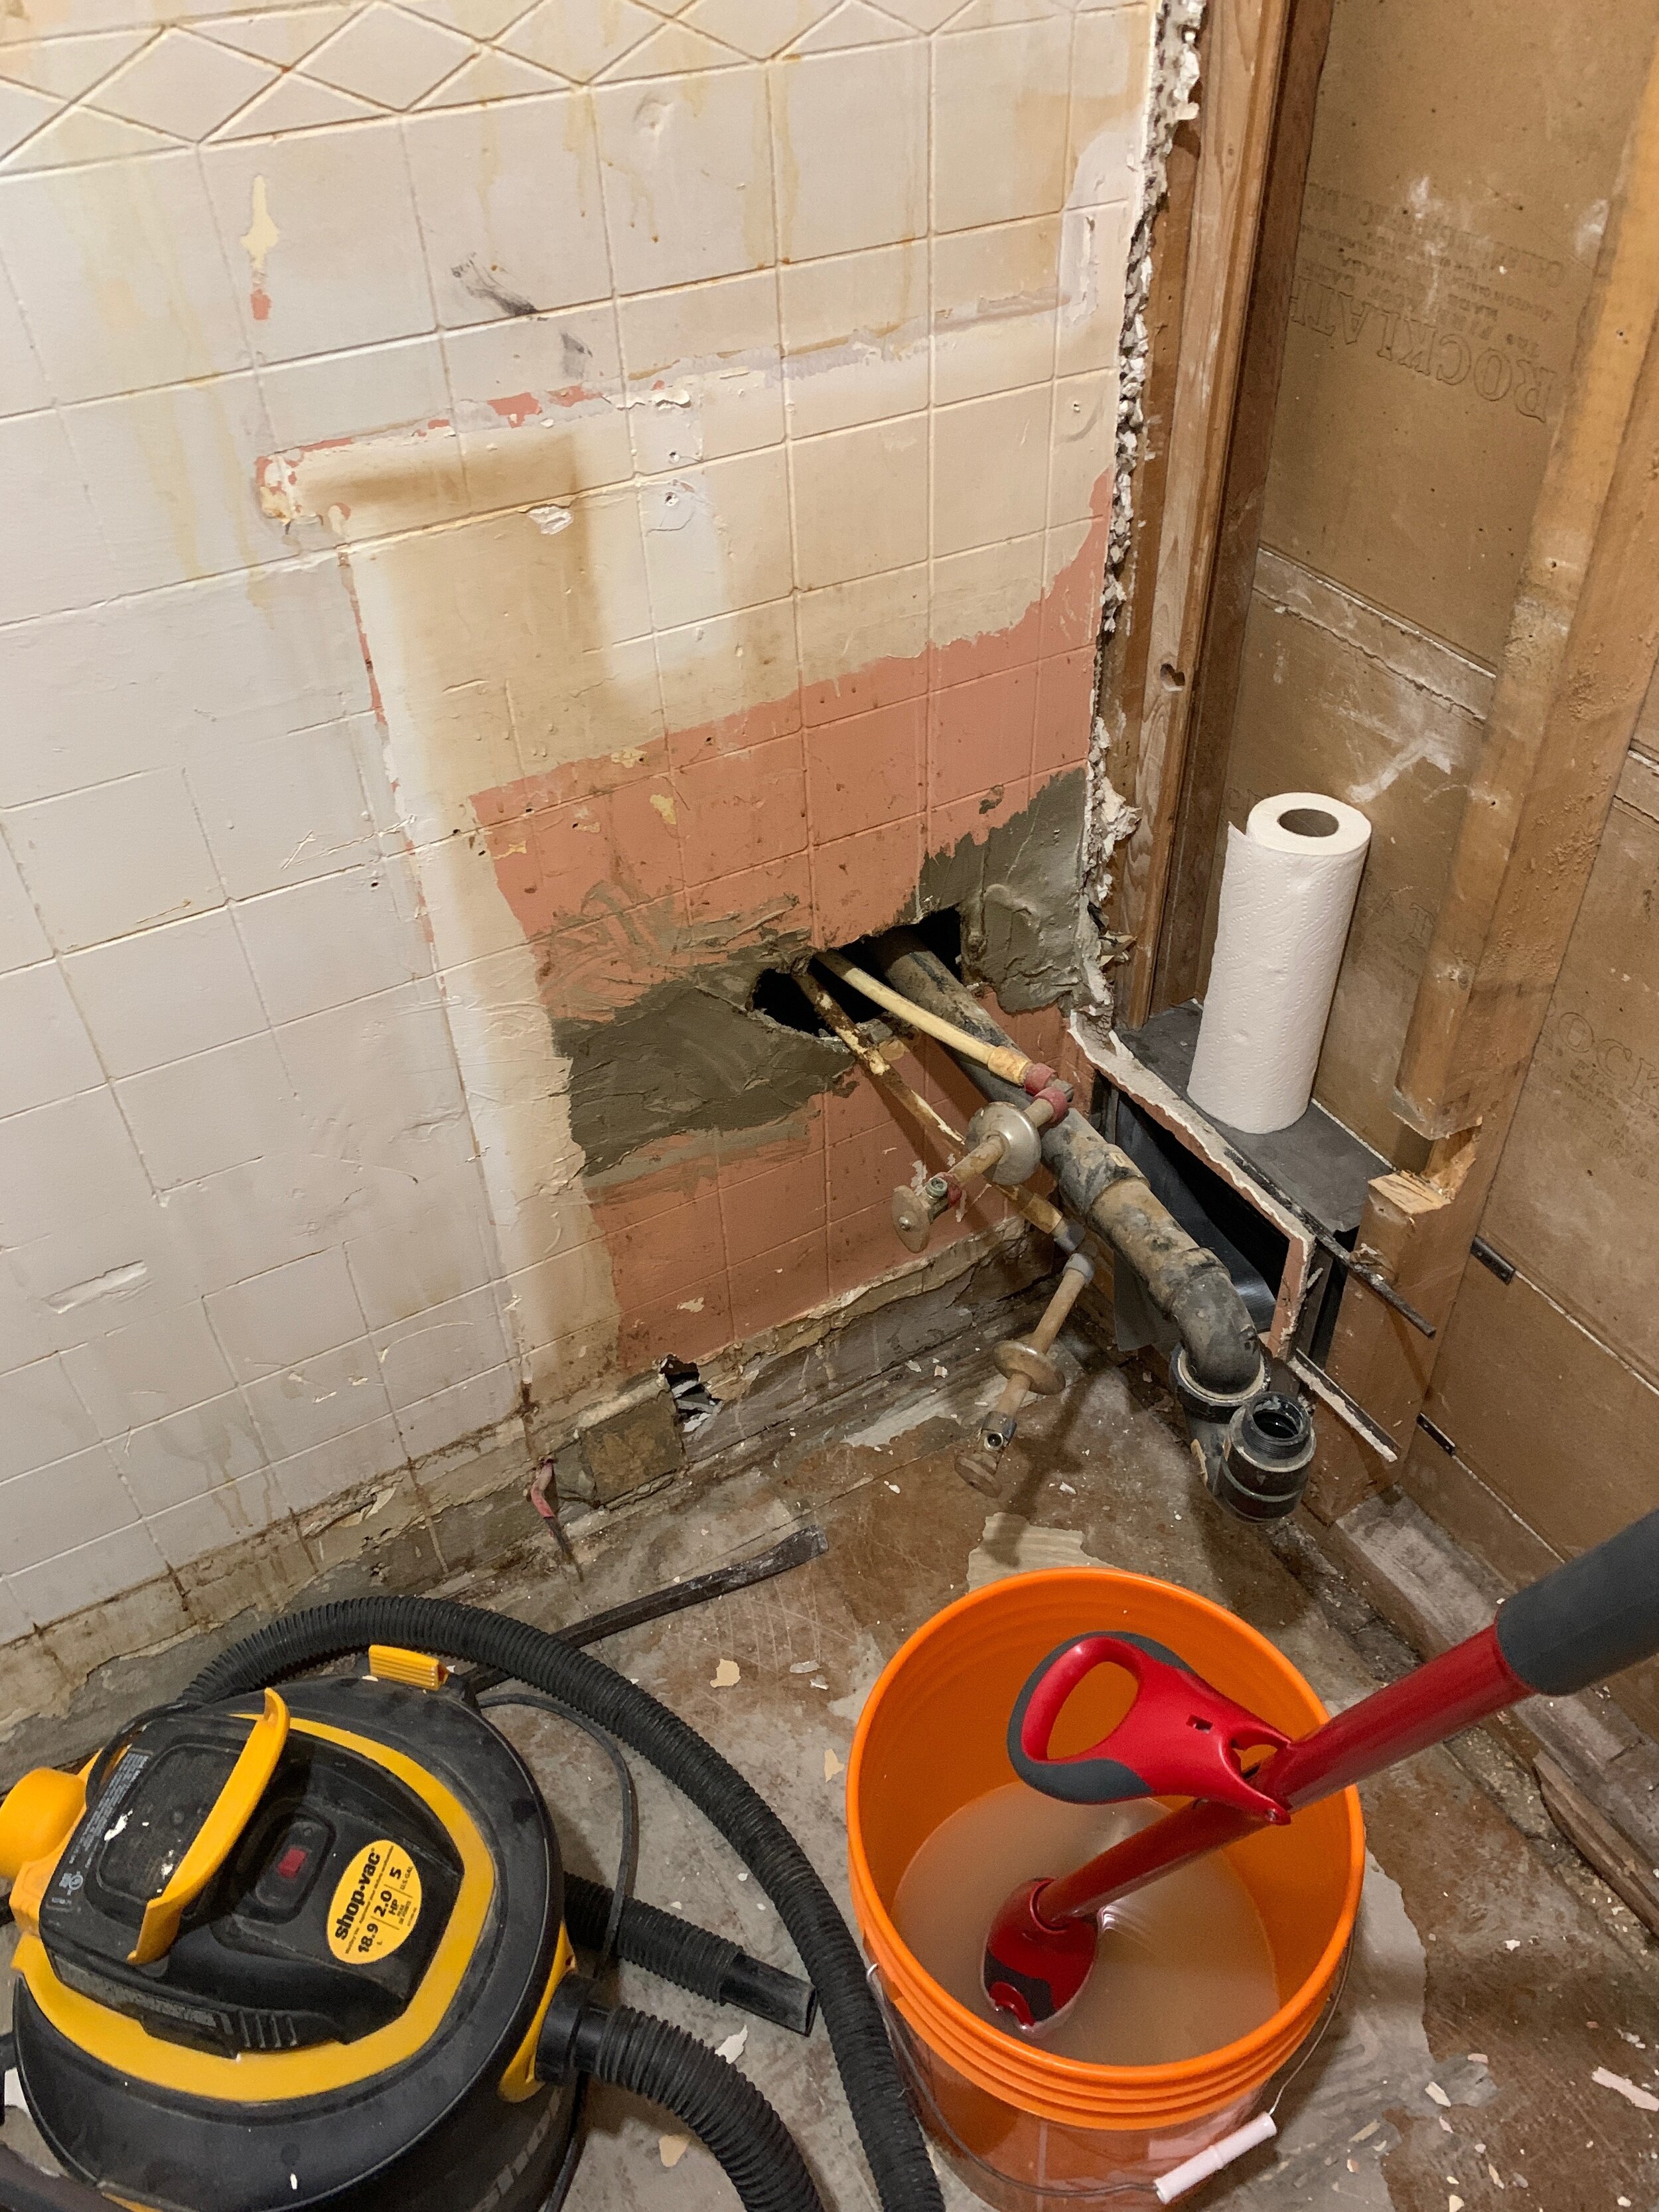
We’re back for week two of the One Room Challenge and a lot of progress has been made in the half bath! If you missed week one you can click here for before photos and the overall design plan! I got started by stripping the bathroom down - emptied out all our things, removed the cabinet, toilet, and vanity, and pulled out the existing flooring and baseboard heater. I also ripped the wall behind the vanity, and part of the one next to it, down to the studs. Once I removed the old vanity I found out that the old plumbing was coming through a large hole into the eaves, was a mess, the drain ran the wrong direction and the hole was framed in cement. Hot mess so I ripped it all out. The new vanity is 3 inches more shallow than the old one so I’m taking this opportunity to move the wall in two inches. This might seem odd as it’s going to make the room (very slightly) smaller, but the extra space inside the wall will allow me to do a few different things:
Move the sink plumbing into that wall so that it enters the back of the vanity instead of the side as it does now (this is the most “correct” and allows us to keep all the vanity drawers usable while still hiding the plumbing since I went with an open-bottom vanity with drawers around the plumbing)
Add two new electrical boxes for wall sconces on either side of the vanity mirror - there was no lighting here before so this will allow me to add the new boxes easily, they’re branching off of an existing outlet that was next to the sink.
Make the existing medicine cabinet slightly deeper and add an electrical outlet to it so that we can keep our electric toothbrushes in it - I’m most excited about this!

I think the trade-off here is well worth it. In the end the vanity will still come out as far as the old one and no one will notice that it feels shallow, but in return I get more usable storage in the vanity, better lighting in the bathroom, and a much more functional medicine cabinet that allows me to keep our toothbrushes off the counter.
Next, I got to work prepping the remaining walls by removing baseboards and the caulking from around the sink. There was a built-in toilet paper holder but it wasn’t large enough for modern rolls so I’m patching it in as well. A big problem when we first moved into the house was smell - the previous owner smoked heavily in the house and the smell really lingers in the walls. This is one of the only spaces we hadn’t yet cleaned so I got to work on that. For a full walk-through of this process you can check out my “Paint Prep” highlight on Instagram!
My best recommendation for removing odour and prepping walls for paint is to scrub the walls and ceiling with TSP using sponge mops. I use two sponge mops and 3 buckets. First I soak the first mop in TSP solution which I use to scrub the walls. After each mop, I rinse the TSP mop in a bucket of water. Once the whole room has been scrubbed with TSP, I go back in with a second mop and a fresh bucket of water to rinse. Then I leave everything until completely dry.
This is a good time to go back and patch any imperfections, making sure to let your plaster or drywall compound dry fully before applying primer.
The next step for covering smells and stains is to use a high-quality primer. I used Kilz brand primer and gave everything two solid coats. I should note that I only primed the top half of the walls. The TSP cleaned them enough to remove the smell and I’m going to be covering the bottom half with stick-on tile. The adhesive works best if the surface beneath it is fully cured so if I primed or painted it I’d need to wait at least 21 days before applying tile. Instead I just scrubbed it really well with the TSP, which is a degreaser, to make sure it was ready.

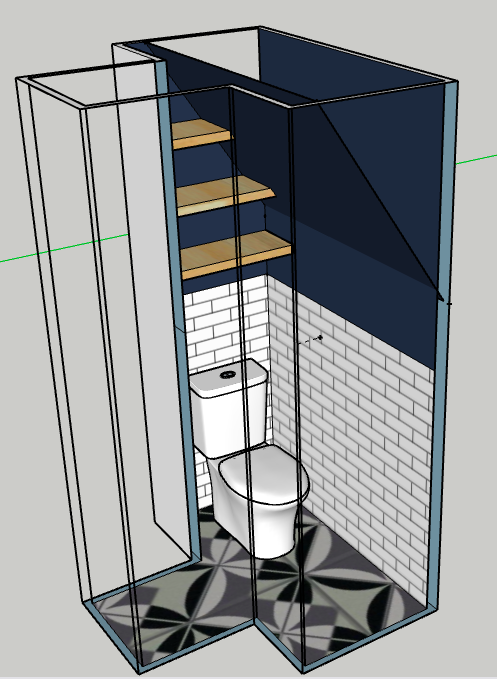
I decided to use a similar colour palette in this bathroom as I did in the full bath to make things a little more cohesive, but I did want to change it up a little. I painted the top half of the walls leading into the ceiling with Valspar Royal Navy. This worked great as the sloped walls mean there’s no real division between wall and ceiling anyways.
Next week I’ll be back to talk tile! In the meantime, check out all the other awesome projects over on the One Room Challenge blog! I’m also sharing updates on my progress over in my Instagram stories so be sure to follow along there!


